


Products
Quick Links
About US
FAQ

Copyright © 2026 BGM Co.,Ltd


Views: 0 Author: Site Editor Publish Time: 2025-09-17 Origin: Site


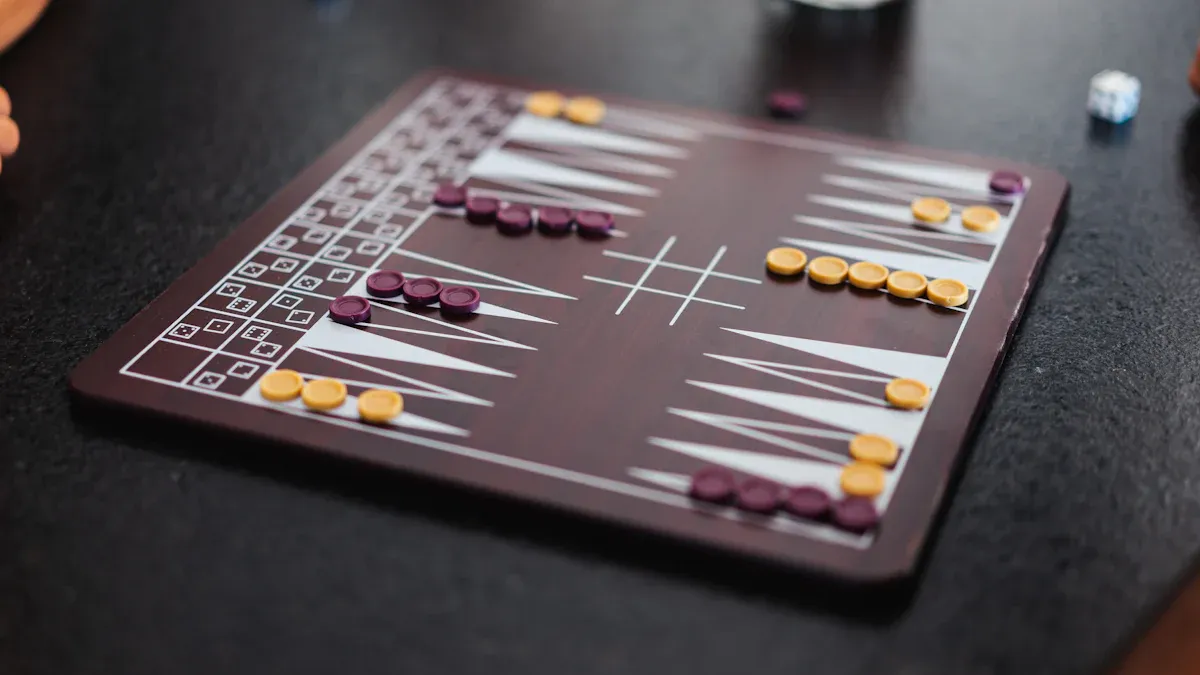
Put two checkers on your twenty-four point.
Place five checkers on your thirteen point.
Set three checkers on your eight point.
Place five checkers on your six point.
Once you know this pattern, setup feels simple every time you play beginner backgammon.
Use the 5-3-5-2 trick to set up your backgammon board fast. This trick helps you remember where to put your checkers.
Always make sure you have all your game pieces before you start. If you are missing checkers or dice, your game will be slower.
Know why the starting formation matters. It shapes your plan and can help you win from the first roll.
Practice setting up the board often. Knowing the board and where to put checkers makes you more confident and helps you play better.
Use the doubling cube carefully. It can raise the stakes and make your opponent feel pressure.
When you sit down to play backgammon, you notice the board has a unique look. The backgammon board is divided into four sections, called quadrants. Each quadrant has a special purpose during the game. Here’s a simple table to help you see how each part works:
Quadrant Type | Description |
|---|---|
Home Board | This is your home base. You move your checkers here to bear them off. |
Outer Board | This area sits next to your home board. You move checkers through here on their journey. |
Opponent's Home | Your opponent’s home board is where they try to bear off their checkers. |
Opponent's Outer | This quadrant is next to your opponent’s home board. |
You play on a board with 24 narrow triangles, called points. These points alternate in color and run along the four quadrants. You and your opponent each have your own home and outer boards. The board sits between you, so you face your home board and your opponent faces theirs.
Backgammon boards come in different sizes. If you want to play on a tournament board, you might use one that measures about 30¼ inches by 20¾ inches. Tabletop boards are a bit smaller, around 27½ inches by 23½ inches. Both types use checkers that are 44 mm wide.
You need a few simple pieces to play backgammon. Each player gets 15 checkers. Usually, one player uses white checkers and the other uses black. You also need two regular six-sided dice. These dice decide how far you can move your checkers each turn.
There’s one more piece you’ll see on the backgammon board: the doubling cube. This special cube shows the current stakes of the game. If you want to raise the bet, you use the doubling cube to do it.
Here’s a quick table to show you what you need:
Component | Specification |
|---|---|
Checkers | 30 total: 15 of one color per player |
Dice | 2 standard six-sided dice |
Doubling Cube | A special cube indicating the current game's bet |
Tip: Always check that you have all your checkers, dice, and the doubling cube before you start a game. Missing pieces can slow down your backgammon match.
You now know the basics of the backgammon board and the pieces you need. This setup helps you get ready for your first game and makes the rules easier to follow.
Setting up your backgammon board the right way makes the game easier and more fun. If you’re new and want to know how to set up backgammon, you’re in the right place. Let’s break it down step by step so you can start playing with confidence.
You need to place your checkers in specific spots on the board. Each player gets 15 checkers. The points on the board are numbered from 1 to 24. You always count from your own home board, moving toward your opponent’s home board. Here’s a simple table to show you where your checkers go:
Point | Number of Checkers |
|---|---|
24-Point | 2 |
13-Point | 5 |
8-Point | 3 |
6-Point | 5 |
You put two checkers on your 24-point, five on your 13-point, three on your 8-point, and five on your 6-point. Your opponent does the same on their side, mirroring your setup. This arrangement is the same for every game, so once you learn it, you won’t forget how to set up backgammon.
If you like visuals, check out this chart. It shows the number of checkers on each point, making it even easier to remember:

Tip: Always double-check your checker placement before you start. A wrong setup can make the game confusing and might give one player an unfair advantage.
Many beginners ask how to set up backgammon without getting mixed up. The 5-3-5-2 mnemonic is your best friend. It stands for:
5 checkers on the 6-point
3 checkers on the 8-point
5 checkers on the 13-point
2 checkers on the 24-point
This simple pattern helps you remember where everything goes. You don’t need to memorize a long list. Just think “5-3-5-2” and you’ll always know how to set up backgammon quickly.
Here’s why this mnemonic works so well:
It’s easy to remember, even if you’re new.
You can set up your board fast, so you spend more time playing.
It matches the official way to set up backgammon, so you’ll be ready for any game.
If you ever get stuck, look for a diagram or chart. Many players find that seeing the setup helps them learn faster.
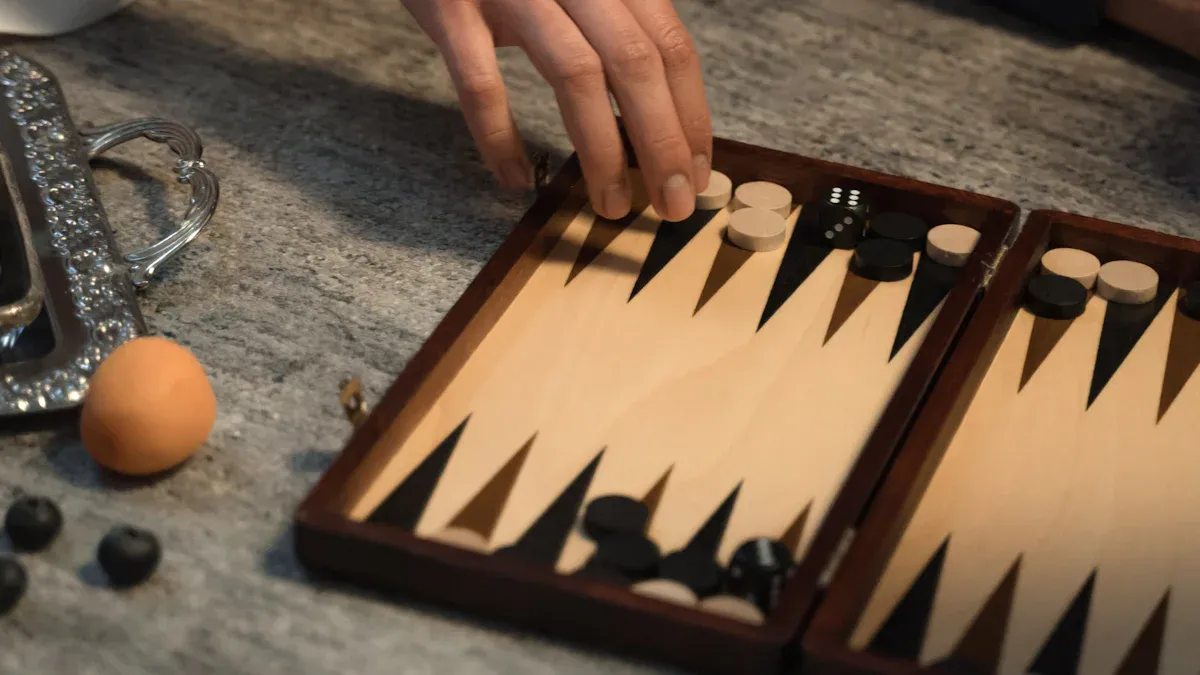
Once your checkers are in place, you need to set up the dice and the doubling cube. Here’s how to set up backgammon for play:
Place two six-sided dice near each player. In tournaments, each player gets their own dice and a dice cup. At home, you can share two dice.
Put the doubling cube in the middle of the board. Set it so the number 64 faces up. This shows that the game starts at a single point, but you can raise the stakes later.
The doubling cube adds excitement to backgammon. From the very first move, you can use it to challenge your opponent. If you feel confident, you can offer a double. Your opponent must then decide to accept or pass. This changes the strategy and keeps both players on their toes.
Note: The way you set up the dice and doubling cube can change if you play in a tournament. At home, you can keep things simple. In official games, you follow stricter rules for rolling and handling the dice.
Memorizing how to set up backgammon is more than just a routine. The starting formation shapes your strategy from the first roll. Here’s why it’s important:
The setup gives you a balance between offense and defense.
Your checker positions create both strong points and possible weak spots.
The way you place your checkers affects moves like running, blocking, and hitting.
If you set up backgammon incorrectly, you might leave a checker open to attack or miss a chance to build a strong position. That’s why it’s smart to practice the setup until it feels automatic.
Remember: Knowing how to set up backgammon is the first step to mastering the game. Once you get the hang of it, you’ll be ready to focus on strategy and enjoy every match.
You’re almost ready to play your first game of backgammon. The next step is deciding who gets the first move. Here’s how you do it:
Each player grabs one die and rolls at the same time.
If you both roll the same number, you roll again. Keep rolling until someone gets a higher number.
The player with the highest roll goes first and picks their color.
This method keeps things fair and adds a little excitement before the game even begins. If you roll doubles during this process, the stakes double and you both roll again. You keep going until someone wins the roll.
Tip: Rolling for the first move is quick and easy. You don’t need any special skills—just a little luck!
Once you know who goes first, you’re ready to start moving checkers. The player who won the roll uses the numbers from both dice for their first move. You don’t roll again; you play the numbers you just rolled.
Here’s a simple table to show how the first move works:
Aspect | Description |
|---|---|
Initial Roll Determination | The player who rolls the higher number goes first. |
Move Execution | The player plays the two numbers shown on the dice. |
Possible Rolls | There are fifteen possible opening rolls, excluding doubles. |
You have fifteen possible opening rolls, not counting doubles. If you tie again, you just re-roll until someone wins. The numbers you roll decide how far you can move your checkers on your first turn.
The initial roll decides who starts the game.
You play the numbers you rolled, moving your checkers forward.
If you tie, you keep rolling until someone wins.
Starting a backgammon game feels simple once you know these steps. You’ll get the hang of it quickly and be ready to play your first match.
When you play backgammon, you move your checkers based on the numbers you roll with the dice. Each die gives you a separate move. You must use both numbers if you can. If you roll doubles, you get to move four times instead of two. You can only move your checkers to open points. An open point is a spot that isn’t blocked by two or more of your opponent’s checkers.
Here’s a quick table to help you remember the main rules for moving checkers:
Rule Category | Description |
|---|---|
Open Points | Move only to points not blocked by two or more opponent checkers. |
Using Dice | Use both dice values for your moves. Doubles let you move four times. |
Must Use Rolls | Always use both dice values if possible. |
Tip: Always check if you can use both dice. If you can’t, use as many moves as possible.
Sometimes you land on a point with just one of your opponent’s checkers. That’s called a blot. If you do this, you hit their checker and send it to the bar in the middle of the board. Your opponent must bring that checker back into play before moving any other pieces. To enter a checker from the bar, you need to roll a number that matches an open point in your opponent’s home board. If all those points are blocked, you lose your turn.
Here’s what you need to remember:
You hit a blot by landing on it.
Your opponent’s checker goes to the bar.
They must re-enter from the bar before making other moves.
To re-enter, they need to roll a number that matches an open point in your home board.
If no points are open, they miss their turn.
Note: Always focus on re-entering checkers from the bar first. You can’t move other pieces until you do.
Bearing off means removing your checkers from the board. You can only start bearing off when all your checkers are in your home board, which is the last six points. You need to roll the exact number that matches the position of the checker you want to bear off. If you roll higher than needed, you can bear off from the highest point available.
Here’s a table to make bearing off easier to understand:
Requirement | Description |
|---|---|
All Checkers in Home Board | You must have all checkers in your home board to start bearing off. |
Exact Dice Roll Needed | Roll the exact number for the checker’s position. Higher rolls let you bear off from the highest point. |
Tip: Try to get all your checkers into your home board quickly. This gives you a better chance to bear off and win the game.
You might think setting up the backgammon board is easy, but small mistakes can sneak in. Sometimes, you forget to place all your checkers in the right spots. You may rush and miss the 5-3-5-2 pattern. If you panic during the game, you could move your checkers into the home board too early. This leaves them open and makes it easy for your opponent to hit them. Many players, even experts, miss the best move because they do not see it as an option. You want to avoid stacking too many checkers on one point. Spread your checkers out to keep your options open.
Tip: Always double-check your setup before you start. Make sure each point has the correct number of checkers. This helps you play a fair and fun game.
Here are some strategies to help you avoid setup errors:
Understand the basic rules and goals of backgammon.
Pay attention to the pip count so you can make smart moves.
Position your checkers to avoid leaving them exposed.
You need to face your home board when you play. Sometimes, players set up the board backward or mix up the direction. This mistake can confuse you and your opponent. If you move your checkers the wrong way, you might lose track of your strategy. Always check that your home board is closest to you. Your opponent should do the same. This keeps the game running smoothly.
Note: Before you start, look at the board and make sure the points are numbered correctly from your side. This simple step saves you from a lot of trouble later.
You should also distribute your checkers across the board. Avoid stacking them all in one area. This makes your position stronger and less vulnerable.
The doubling cube adds excitement to backgammon, but many players forget about it. Some ignore its strategic value. Others play too cautiously and miss chances to double. You might misunderstand the score and make a poor doubling decision. Here’s a table showing common doubling cube mistakes:
Mistake Description | Source |
|---|---|
Overlooking the doubling cube and its strategic importance. | Common Mistakes in Backgammon |
Playing too conservatively with the doubling cube, often leading to missed opportunities. | Doubling Cube Strategy |
Misunderstanding the implications of scores like 2-away/2-away, leading to incorrect doubling decisions. | Doubling Cube Made Simple |
Callout: Use the doubling cube to put pressure on your opponent. If you feel confident, offer a double. This can change the pace of the game and give you an edge.
You want to use the doubling cube wisely. It helps you control the stakes and can turn the game in your favor.
You’ve learned how to set up your backgammon board using the 5-3-5-2 mnemonic. Place your checkers on the right points and keep track of their positions. Practice the setup often. You’ll build confidence and make smarter moves as you play.
The board has 24 triangles and four quadrants.
Each player starts with 15 checkers in a specific formation.
Repeated practice helps you recognize patterns and improves your accuracy.
Ready for more?
Explore strategies from expert books.
Watch skilled players in action.
Try new venues and learn from every game.
Mastering the setup is your first step to enjoying backgammon. Once you feel comfortable, dive into advanced tactics and sharpen your skills.
You always move your checkers from your 24-point toward your 1-point. Your home board sits closest to you. Your opponent moves in the opposite direction.
Tip: Face your home board and move your checkers clockwise.
When you roll doubles, you get to move four times instead of two. For example, if you roll two threes, you can move a total of twelve spaces.
Roll | Moves Allowed |
|---|---|
3-3 | Four moves of three spaces |
Yes, you can split your dice roll between two checkers. For example, if you roll a 4 and a 2, you can move one checker four spaces and another checker two spaces.
You must re-enter each checker into your opponent’s home board. You need to roll a number that matches an open point. If you can’t enter, you lose your turn.
Remember: You can’t move other checkers until you re-enter all checkers from the bar.